

Element Two: Structure
Boxes & Cylinders
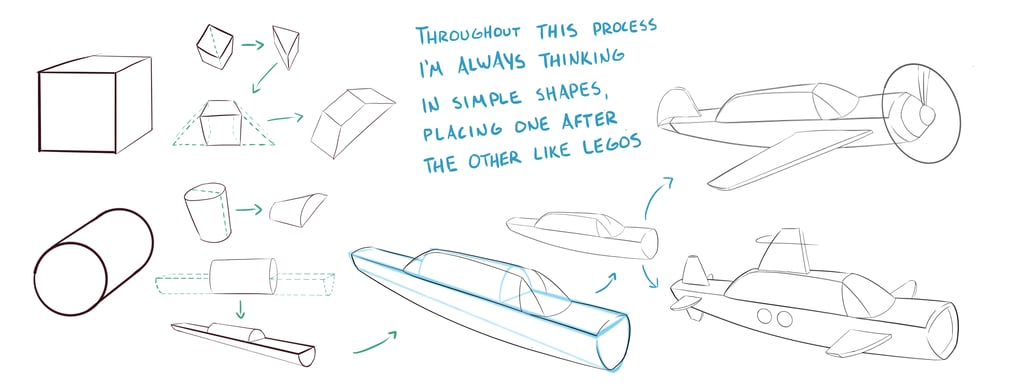
In the last element I mentioned how everything can be framed within the confines of a rectangle or ellipse. If we want to really understand how to draw and represent 3D objects though, boxes/rectangular prisms are far more useful. Boxes and cylinders can be used as building blocks to make absolutely anything.
We want to know how a little cube would look from any angle, rotation, and/or distance. Our minds should turn into little movie sets where we can move around the camera to get a shot from anywhere.
If you can't fully grasp the most simple 3D shapes that exist, you will never be able to freely and accurately draw the more complex objects. I don't care what your favorite subject matter is. Whether it's anime girls, ethereal landscapes, or cyberpunk spaceships. These all require a solid understanding of three-dimensional space and perspective to be able to draw realistically--especially from imagination.
M A T E R I A L S - P A R T O N E
The example above shows how the mish-mashing of a few simple shapes can quickly start to form the complex objects we see in day-to-day life. We'll come back to all this mish-mashing in the next element. First, let's make sure we understand how these simple, three-dimensional shapes are represented on two-dimensional surfaces (paper, monitors, TV screens, etc.).
W A T C H V I D E O
Remember
Shapes are just building blocks that can be stacked and glued together to make up an object... like Legos!
If you'll recall, in part two of element one, I demonstrated how perspective affects flat, 2D shapes like paper. Let's expand on that knowledge and explore the third dimension.
Perspective - The Three Dimensions
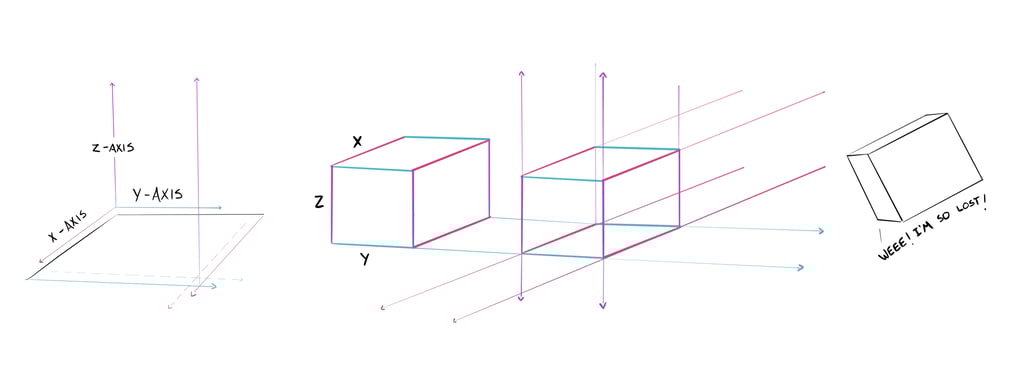

A two-dimensional shape has two underlying "axis," known as the x and y-axis. Meanwhile, 3D shapes have a third axis, the z-axis. You might recognize these as math terms because art, in a sense, is just geometry taken to an extreme. We won't be doing any actual geometry here but we can use these terms to better understand how a shape behaves in space.
For starters, lines on the x-axis will always, always, always head in the same direction. Same with lines on the y-axis and lines on the z-axis.
In this example, we can see that the y-axes of the colored boxes are perfectly aligned. This gives us the impression that the boxes exist within the same space and are most likely on a flat, level surface--like the floor. The black box, on the other hand, looks out of place.
The black box from the previous example appears to be off and floating in space because its vanishing point is different from that of the colored boxes.
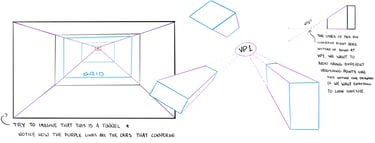
Vanishing Points
In the examples above we can see that the purple lines very clearly converge towards a certain point and the blue lines don't.

Each part of a lesson will have at least one technical exercise and one creative exercise, sometimes more. The idea isn't to execute these exercises to perfection. Do them to the best of your ability and move on to the next part. You'll have plenty of opportunities to improve your line quality in later exercises. All of these exercises should be done TRADITIONALLY unless stated otherwise. I make most examples digitally to keep the website looking clean and speed up the time it takes to make lessons.
Assignments
Technical
Creative
Boxes on a Grid
Mindless 50
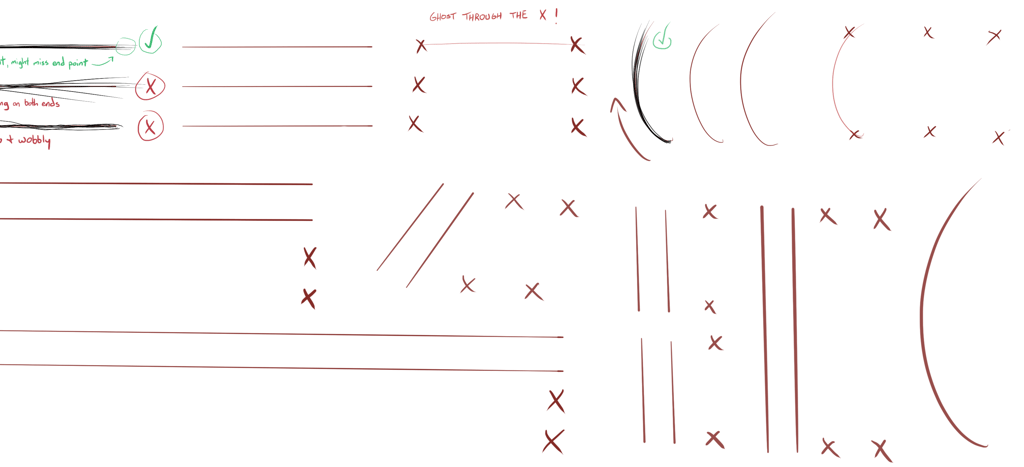
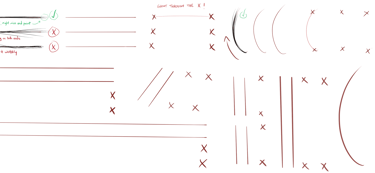
Real simple, put down one line and then go over that same line 7 times. Feel free to use this layout or make your own, but make sure to have varying lengths & some curves in there. You can use a straight-edge for your first few beginning lines. Practice ghosting your first line as well! Use X's to mark your points like outlined below. Think. Ghost. Execute.
The goal is to have all 7 lines match each other as close as possible.
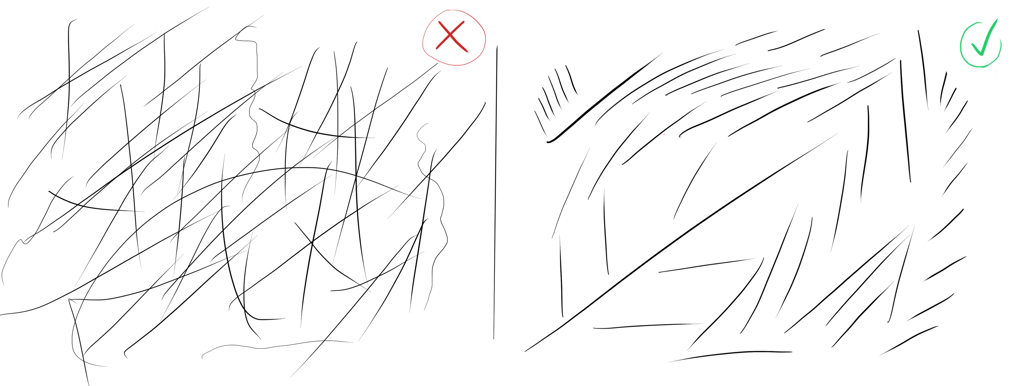
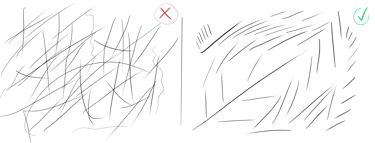
Draw 50 random lines that don't touch each other. That's it. Don't think about where to place them. Let them land wherever they land. Oftentimes, great ideas come from the most random places.
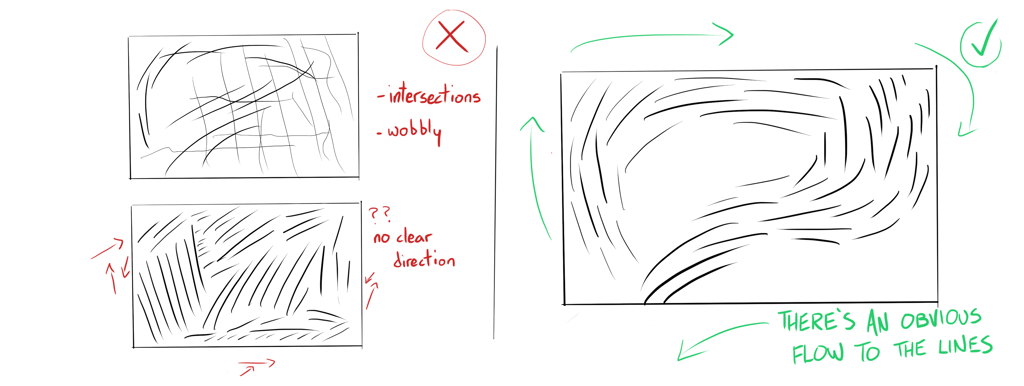
Within a "frame" draw 50 lines that don't touch each other and also create some visual interest. The way the lines are placed should lead your eyes around the frame somehow. Left to right. Corner to corner. Towards the center. Up to you.
Leading 50
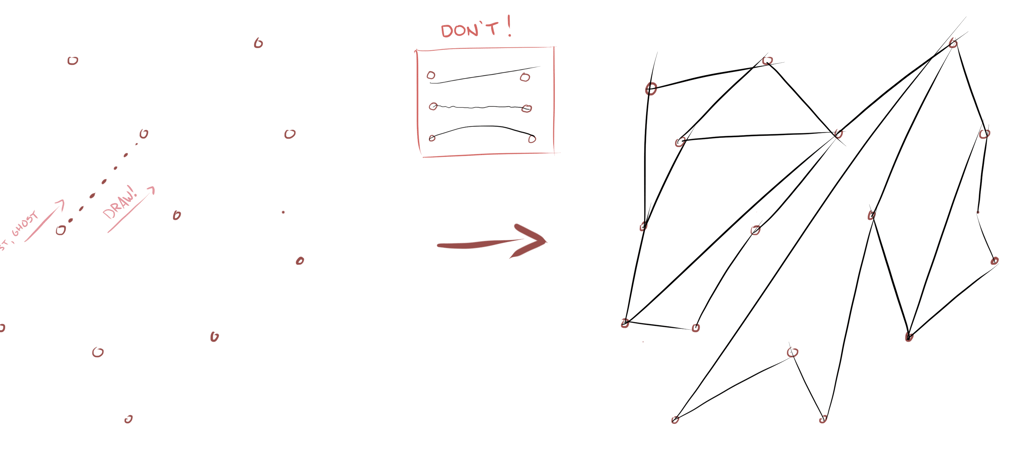
Ghosted Lines
Scatter 16 dots (or more) all over an empty page. These dots will represent start and end points.
Using the ghost method, connect all the points together. Again, we're focused on getting smooth & confident lines that are made with the full extent of our arm. WORK OUT THOSE SHOULDERS!